


Can I Have Multiple Venmo Accounts? Here’s How to Do It Right
Managing your money with digital payment apps, especially Venmo, is easier than ever. Venmo is leading the pack for quick, no-hassle money transfers to help you with everything from splitting the check at your favorite diner to paying your roommate for rent. But many users wonder: can they maintain multiple Venmo accounts to organize their finances effectively? This is a common question, particularly for small business owners and freelancers aiming to track their diverse income streams.
In this guide, we will break down everything you need to know about Venmo’s policies on multiple accounts, explore your options for managing business and personal finances, and help you determine the best setup for your unique situation.
What Are Venmo’s Account Rules for Holdings Multiple Accounts?
While Venmo typically restricts users to one personal account for security reasons, there are certain situations where multiple Venmo accounts may be permissible. For instance, if you share a bank account or debit card with someone else, such as a spouse or family member, both parties can have their own separate Venmo accounts linked to that shared financial source. This equitable sharing allows easier transaction management.
If you’re running a business, Venmo offers the option to create a dedicated business account. This feature enables you to keep your work and personal transactions distinctly organized. The separation helps you effectively track different types of expenses and maintain clear financial records, significantly aiding in fiscal responsibility.
What Are Venmo Account Restrictions for Multiple Users?
Venmo maintains a set of specific rules governing account setup and usage to ensure user safety and prevent platform abuse.
Managing Multiple Venmo Accounts: Setup and Requirements
Setting up multiple Venmo accounts is simple but comes with essential requirements. You will need separate email addresses and phone numbers for each account, as this is a crucial security measure Venmo employs for user protection. The platform allows you to create an additional account conveniently through the app’s settings menu. However, remember that you cannot use the same phone number twice across these accounts. This rule helps Venmo maintain a secure environment for all users while providing the flexibility to manage different accounts for various purposes.
Keeping Your Venmo Accounts Safe and Secure
Venmo prioritizes your security by integrating several protective measures. When you use the app, your account benefits from two-factor authentication and PIN codes, which add an extra layer of protection. Furthermore, your personal and financial information is securely encrypted. In case Venmo detects unusual activity on your account, it will temporarily pause and request you to confirm your identity, ensuring that it is genuinely you authorizing those transactions.
Venmo Account Limitations You Should Know
Venmo enforces several critical limitations to safeguard your money and ensure account security. You can send up to $4,999.99 from your account each week, and every account must feature its unique phone number. The platform does not permit international transfers, and be particularly cautious about phone numbers—attempting to use the same one for multiple accounts can lead to account suspension. While these rules may seem strict, they are instituted to protect you and other Venmo users against fraudulent acts while maintaining the platform’s smooth operation.
Setting Up Multiple Venmo Accounts with the Help of GeeLark
Setting up multiple Venmo accounts is indeed quite straightforward. The primary consideration is that you will require different contact information for each account. This means that you need to have a separate email address and phone number for your personal account and each additional account, like one designated for your business activities. When you are set to create a new account, head to the Venmo website or app and follow the standard signup procedure with your new contact details. This straightforward approach ensures that your accounts remain organized and secure while allowing you to manage various facets of your financial life separately.
Utilizing a GeeLark antidetect phone elevates the security of your accounts to a whole new level. For those who might not be familiar with the concept of antidetect software, it can be simply understood: consider each of your cloud phone profiles as a regular Android phone. They can perform all the functions of a standard device but allow you to do so in bulk and keep everything neatly stored within one application on your desktop.
The absolute maximum level of antidetection comes from keeping your accounts operational on different devices. By doing this, Venmo cannot trace your activities, allowing you to present different device information and appear as distinct users.
For a step-by-step guide on setting up your accounts, it’s truly simple, and you can complete it independently in just a few straightforward steps:
Sign Up: Visit the GeeLark website to download and create an account. Choose a subscription plan that meets your needs.
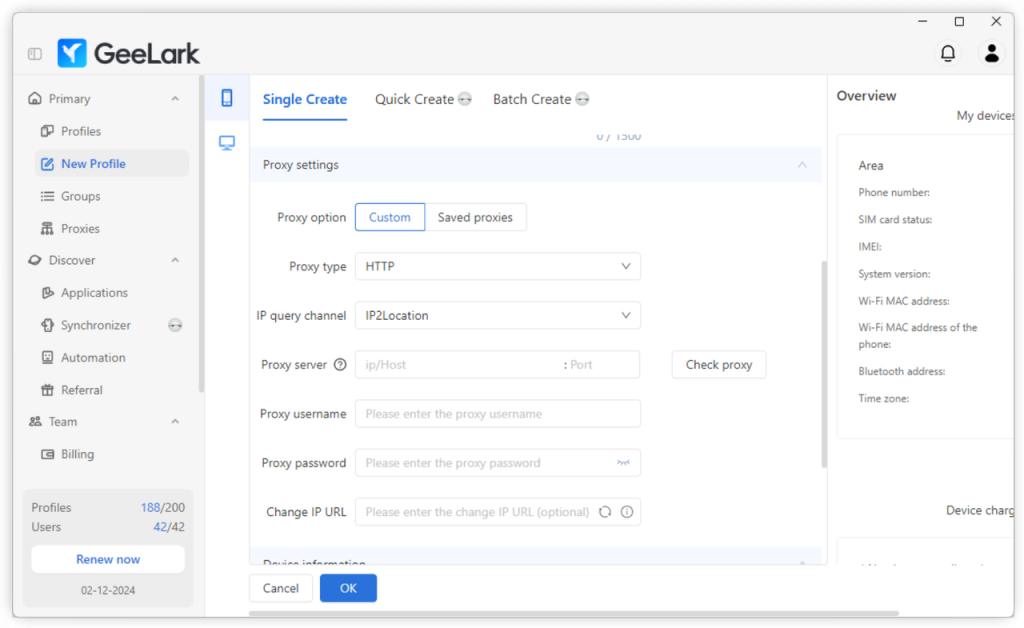
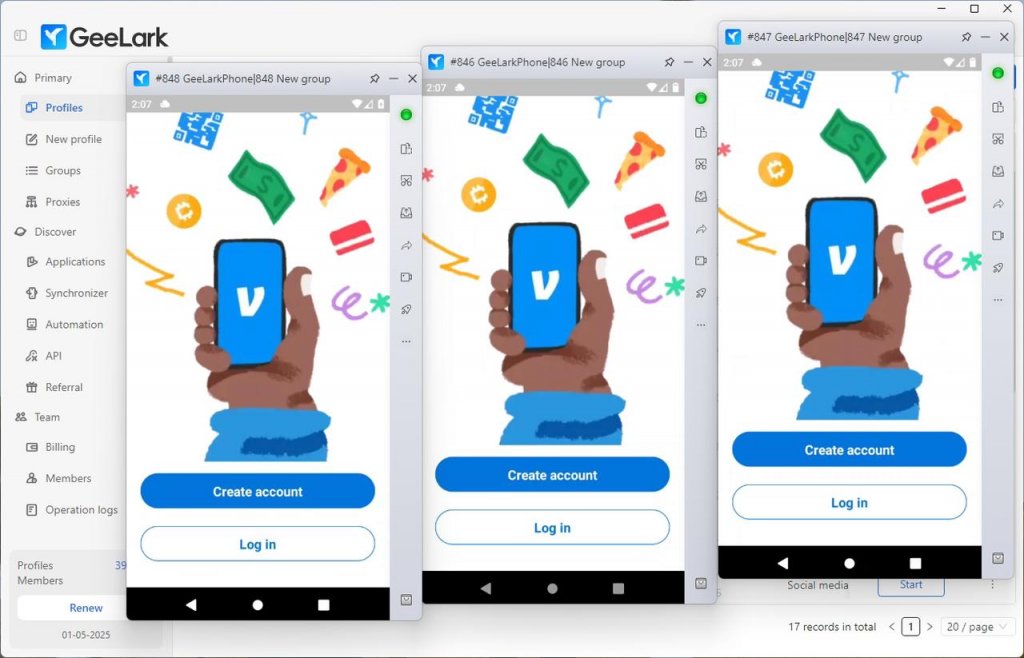
Create Cloud Phone Profiles: Once logged in, click the New profiles button to establish a cloud phone profile. Add your proxy information to finish this setup. You have the ability to create and customize multiple devices as required.
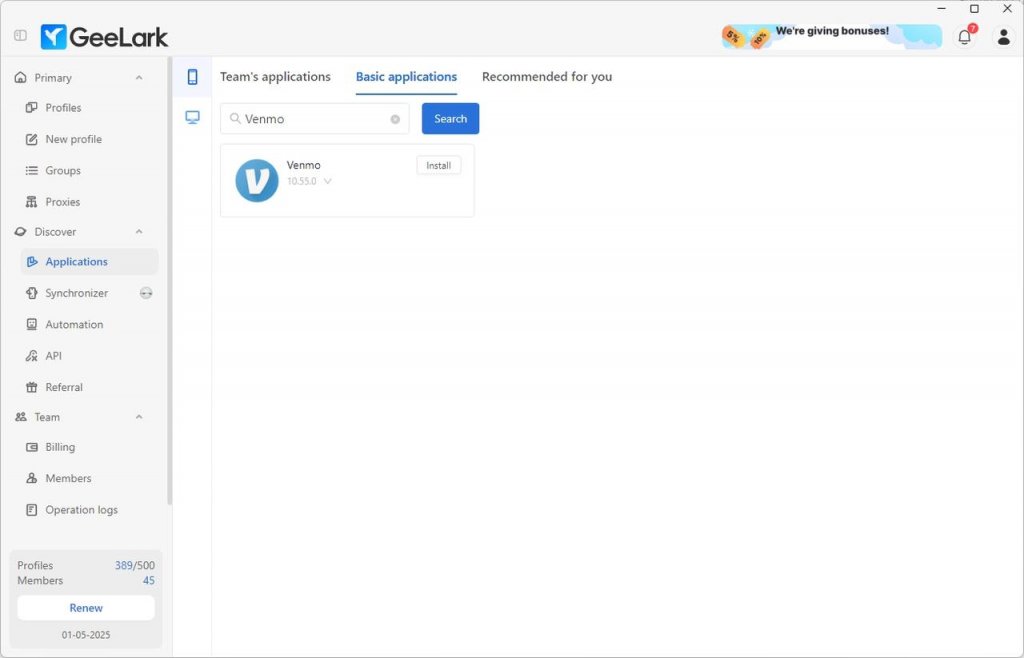
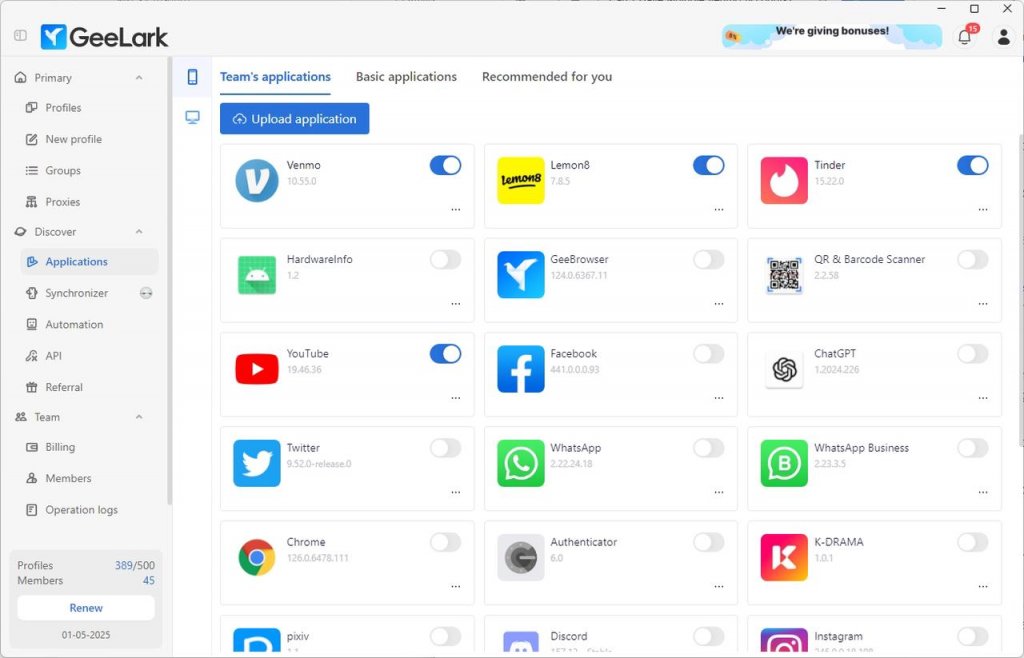
Install Venmo: Download the Venmo app from the Basic applications section in the Applications menu.
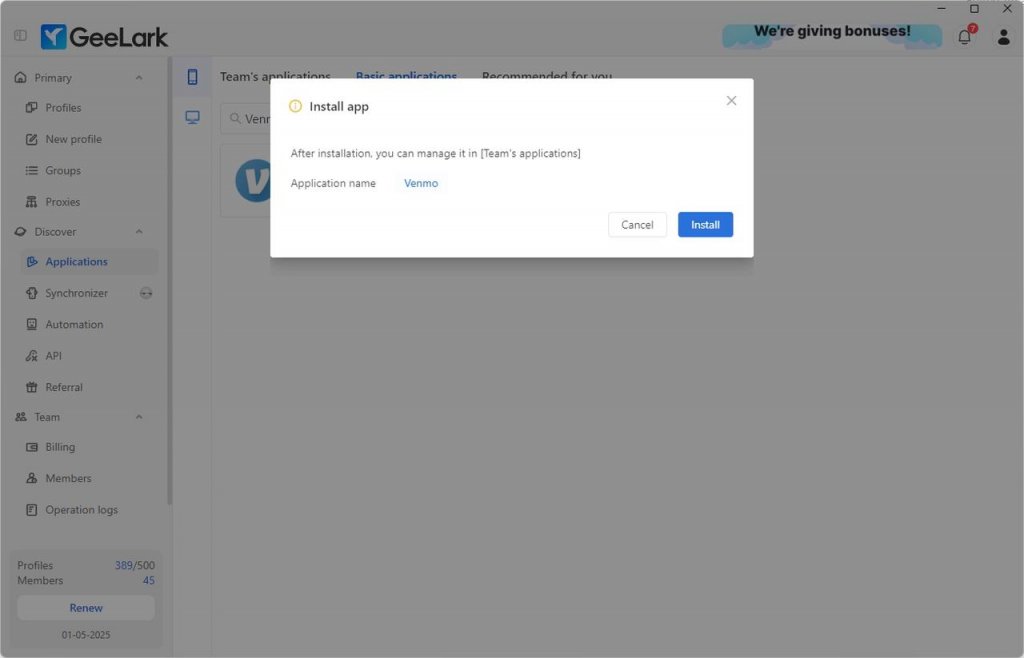
Enable Installation: After uploading, the Venmo icon will appear in the Team’s applications. Click to enable the Venmo installation, and the app will automatically install on all your cloud phones.
Account Setup: Launch Venmo on each cloud phone profile and create your accounts. Complete the verification for each one using different email addresses and phone numbers to ensure compliance with Venmo’s policies.
Track your cloud phones through the GeeLark dashboard, where you can manage settings and add new profiles whenever needed. That’s all there is to it—you are ready to go!