GeeLark RPA Guide for Beginners ( 2 )
GeeLark RPA Guides
GeeLark RPA Guide for Beginners ( 1 )
GeeLark RPA Guide for Beginners ( 3 )
GeeLark RPA Guide for Beginners ( 4 )
Wow, I didn’t expect this—you’ve chosen to continue learning RPA! That’s awesome! I promise, you won’t be disappointed. This chapter is super simple, and I’m confident it won’t be a challenge for you.
Your goal for this chapter is to learn how to create RPA tasks using ready-made templates.
To put it simply, I want you to experience the fifth stage I mentioned earlier: creating the template. For now, don’t worry about the first four stages—just take a look at how an RPA task runs. You’ll use templates developed by third-party developers to create your first task.
For Newcomers
If you’re new here, I recommend checking out the first tutorial to learn about the five stages of RPA and some preparatory steps before diving in.
1.RPA Store
Here, you’ll find a variety of RPA templates provided by third-party developers. These templates cover platforms like YouTube, TikTok, Facebook, and more.
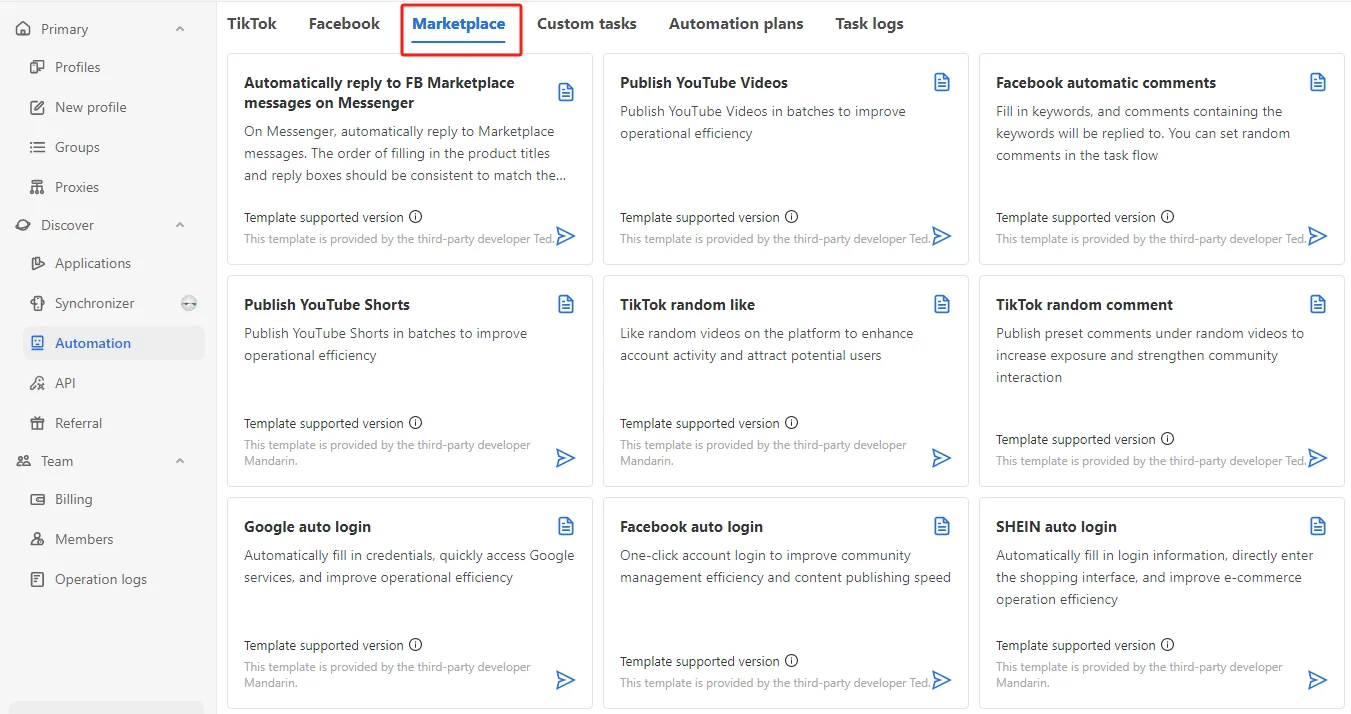
2.Select a Template
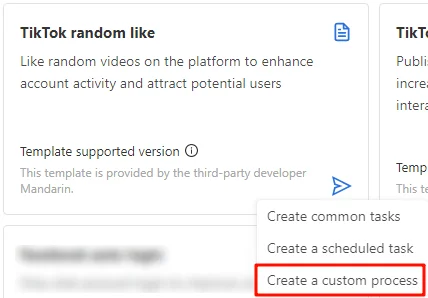
Choose the “TikTok random like” template for this tutorial, and then select “Create a custom process” to proceed.
3.Add New Template
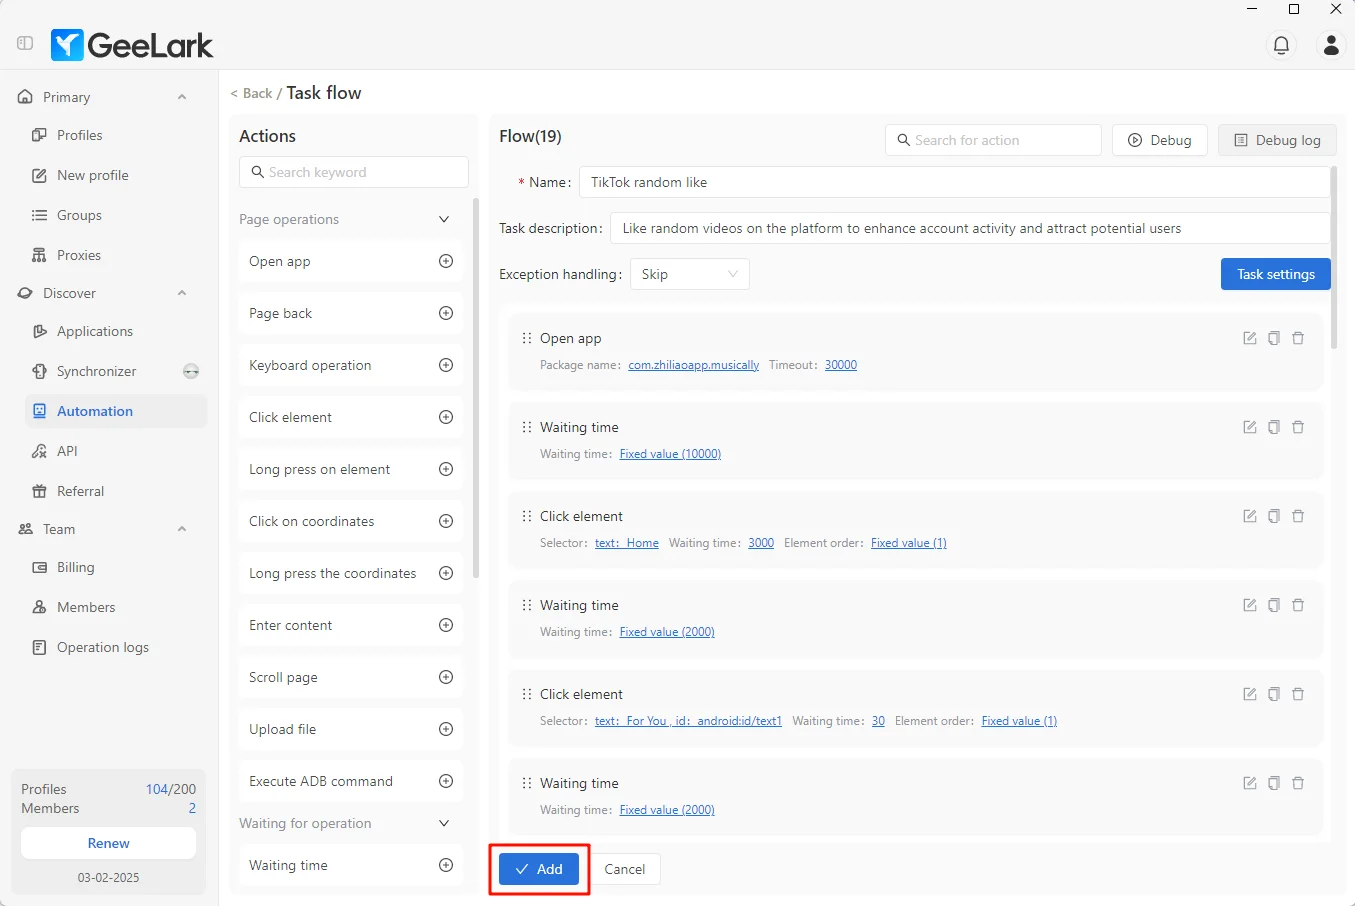
Enter the RPA template editor, also known as the “Task Flow” interface.
Don’t worry! You’re not expected to edit the RPA template just yet. For now, all you need to do is click the “Add” button at the bottom of the screen.

4.Create a Task
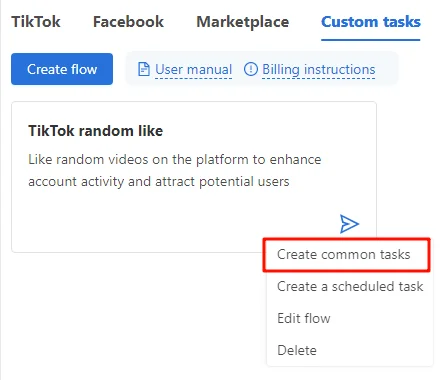
Click “Custom Task”, and you’ll see the RPA template (workflow) you just created.
Next, click the Edit Template button and select “Create common tasks” to proceed.
There are three sections you need to configure:
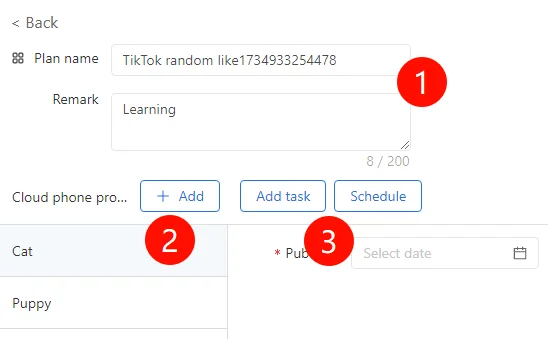
1.”Plan Name” and “Notes”:
Enter the name of the RPA task plan.
2.”Cloud phone profile”:
Add the cloud phone profile where the RPA plan will be executed.
3.”Add Task”:
Set different execution times for the cloud phone profile. For example, assign specific execution times for the cloud phone environment named “Puppy.”
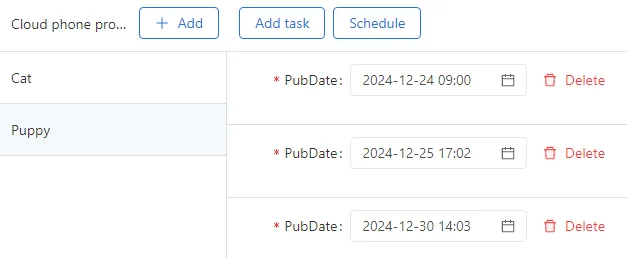
3.”Schedule”:
Set a unified execution time for the selected cloud phone profiles.
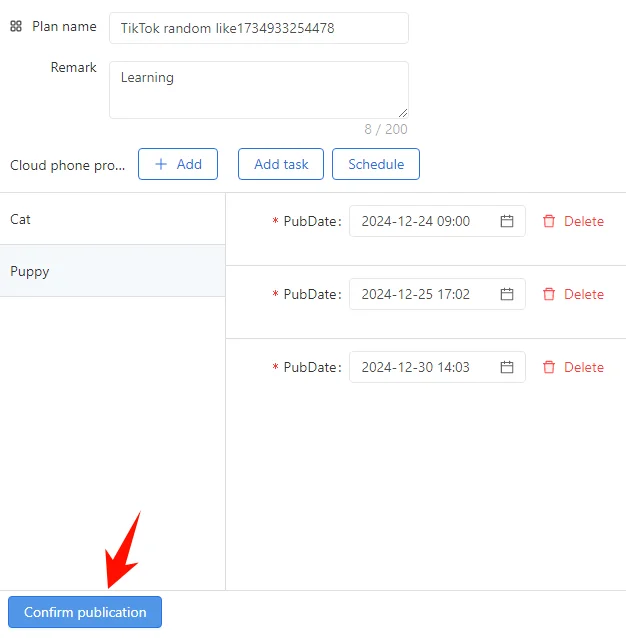
After setting the execution time, make sure to click “Confirm publication”. To quickly experience the process, you can set the execution time to 3 minutes from now.
5.View Task Logs
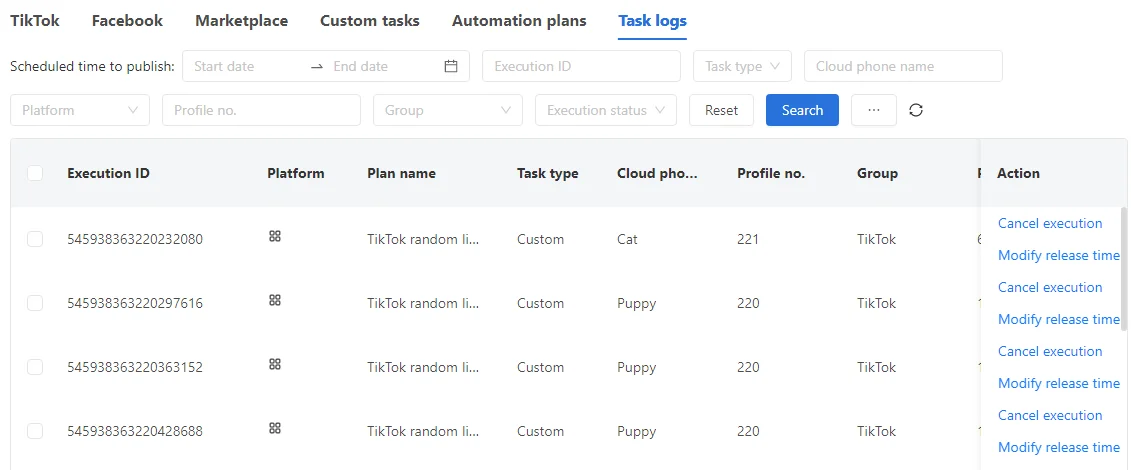
In the “Task Logs”, you can view the task you just scheduled. You can also “Cancel execution” or “Modify release time” anytime. Now, all you need to do is wait for the task to complete.
Great! If you’ve followed the steps above, it means you’ve taken a significant step forward in understanding how to use GeeLark RPA. In the next chapter, I’ll guide you through creating your first simple RPA template.
For now, you can close this page and take care of other things. Come back tomorrow to continue with new part.
What? You still have time and energy? I’ll be right here waiting for you, as always. See you soon!
GeeLark RPA Guide for Beginners ( 1 )
GeeLark RPA Guide for Beginners ( 3 )
GeeLark RPA Guide for Beginners ( 4 )
GeeLark RPA Guide for Beginners ( 5 )
