
How to set up Bright Data proxies in GeeLark
Bright Data, formerly known as Luminati, is a leading proxy service provider that offers residential and data center proxies for web scraping purposes. With over 72 million IP addresses in its proxy network, it is one of the largest providers in the industry.
In this article, we will introduce how to set up Bright Data static and rotating proxies in GeeLark.
Download GeeLark
Download the GeeLark app and create a new account to get started.

Bright Data proxy integration
Static proxy
- Log into your Bright Data account, choose the type of proxies you wish to use, and click “Get started.” Once you’ve created a proxy channel, select it to edit and get the proxy information.


- Open the “Configuration” tab, then click “Download IP’s list” to save it as a TXT file.

- Open the downloaded TXT file to view the proxy information. Each line begins with “brd.superproxy.io beginning” and contains complete proxy details, including the proxy host, port, username, and password.

- Click “New profile”, and fill in the profile name, group, tags, and other information.
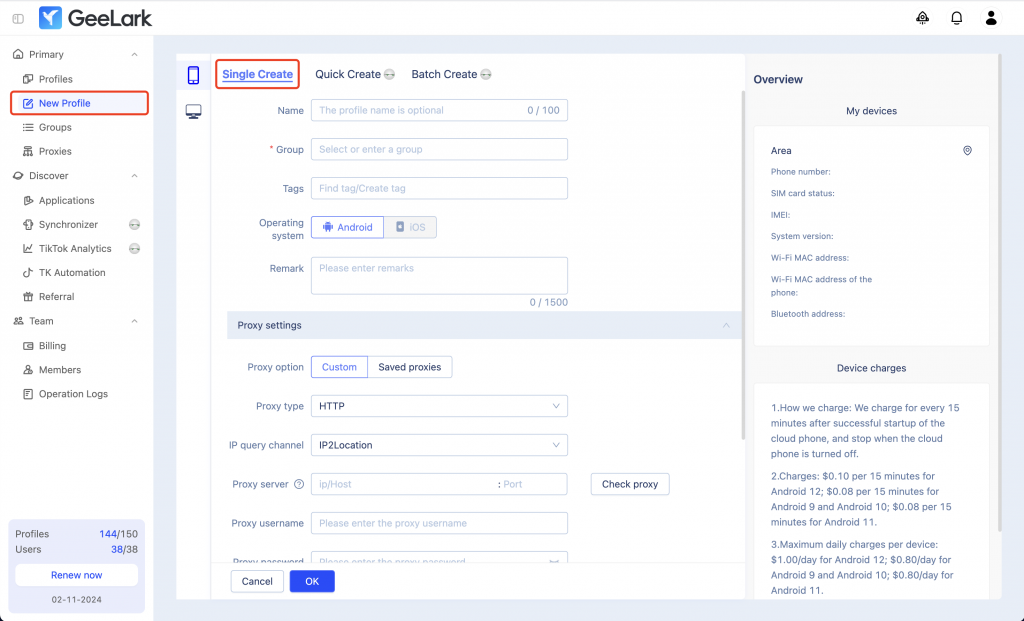
- Choose the “Custom” proxy option and select the “HTTP” proxy type. Then, enter the proxy information obtained in step 3. Finally, click on “Check proxy” to verify the connection.
- Choose the desired cloud phone type and configure the cloud phone area. Click “OK” to complete the profile creation.

Dynamic proxy
- Create a rotating proxy channel, then enter it to get the proxy information.


- Head to the “Proxies” section and open the “Proxy configuration” tab. Fill in the information required from the previous step, then click “Save settings”.

- Click “New profile”, and fill in the profile name, group, tags, and other information.

- Select the “Custom” proxy option and “Lumauto” proxy type, then choose a needed country/region.

Note: If you haven’t added the Bright Data dynamic proxy (Luminati) in the “Proxies” section of GeeLark, make sure to uncheck the “Luminati dynamic proxy” box.
- Choose the “Custom” proxy option and select “Lumauto” as the proxy type. The proxy host and port will be set up automatically, so you only need to enter your Bright Data proxy username and password. After that, select your desired country or region, and click “Check proxy.”
