
Smartproxy: Your Gateway to Secure and Flexible Internet Access
Imagine having access to over 65 million secure internet connections at your fingertips. That’s exactly what Smartproxy offers – a vast network of reliable connections from real homes, mobile devices, and data centers worldwide. Whether you need to maintain a consistent connection for up to 24 hours or switch between different locations, Smartproxy makes it simple and cost-effective.
Features for Modern Needs
Smartproxy offers several specialized proxy types to meet specific needs:
Static (ISP) Residential Proxies: Perfect for users requiring stable, ISP-assigned IP addresses for consistent web scraping and social media management.
Mobile Proxies: With access to 10M+ rotating 3G/4G/5G mobile IPs and support for 700+ mobile carriers, these proxies offer unmatched legitimacy and success rates.
Datacenter Proxies: Featuring 400K+ high-speed IP addresses, these proxies are ideal for users prioritizing speed and cost-effectiveness.
Site Unblocker: An advanced solution designed to handle sophisticated anti-bot systems, ensuring successful data collection from any website.
Flexible Configuration and Usage
The shared proxy network allows simultaneous access to all proxy pools, maximizing cost-efficiency, while private dedicated datacenter proxies provide exclusive IP access for users requiring complete control.
The platform’s rotating proxy network is particularly impressive, offering the flexibility to change IPs with every request or maintain the same IP for extended periods. This feature is invaluable for tasks requiring different levels of IP persistence.
Global Reach with Local Precision
Geographic targeting is another area where Smartproxy excels. Through a simple backconnect node, users can access IPs from any location worldwide. The platform supports state and city-level targeting, making it ideal for businesses requiring precise geographic positioning for their online activities.
Setting Up GeeLark Cloud Phone Profile with Smartproxy
Setting up your GeeLark cloud phone profile with Smartproxy is a straightforward process. Follow these steps to get started:
Initial Setup
- First, create your GeeLark account by signing up on the official website.
- Download and install the GeeLark application from the official download center.
- Launch GeeLark and locate the New Profile button at the top left corner of the interface.
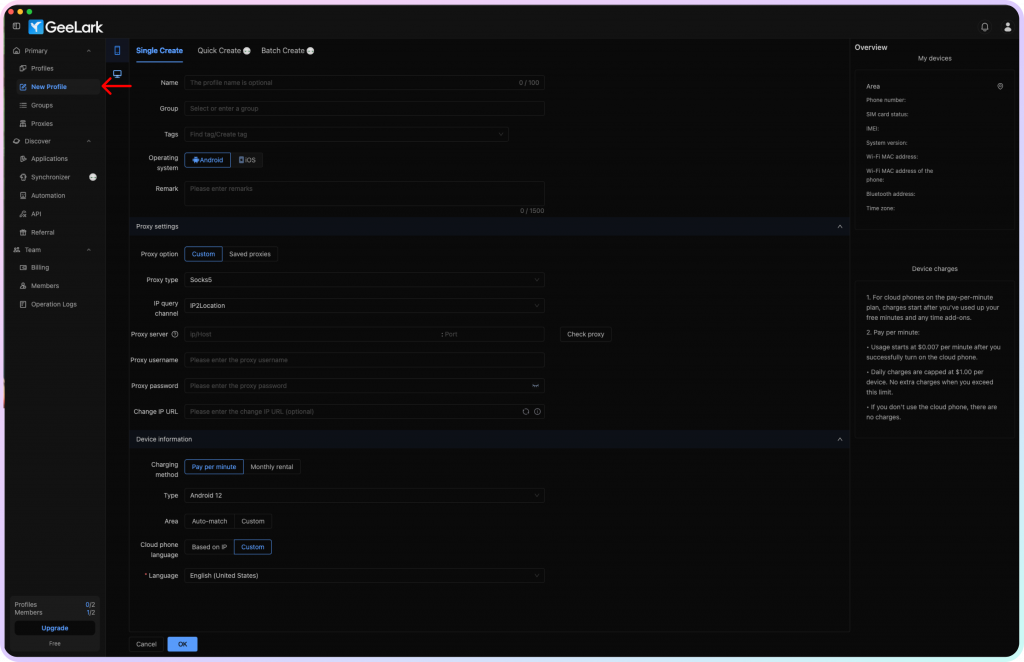
Configuring Proxy Settings
- In the profile creation window, scroll down until you find the Proxy settings section.
- Change the Proxy option to Custom to enable manual proxy configuration.
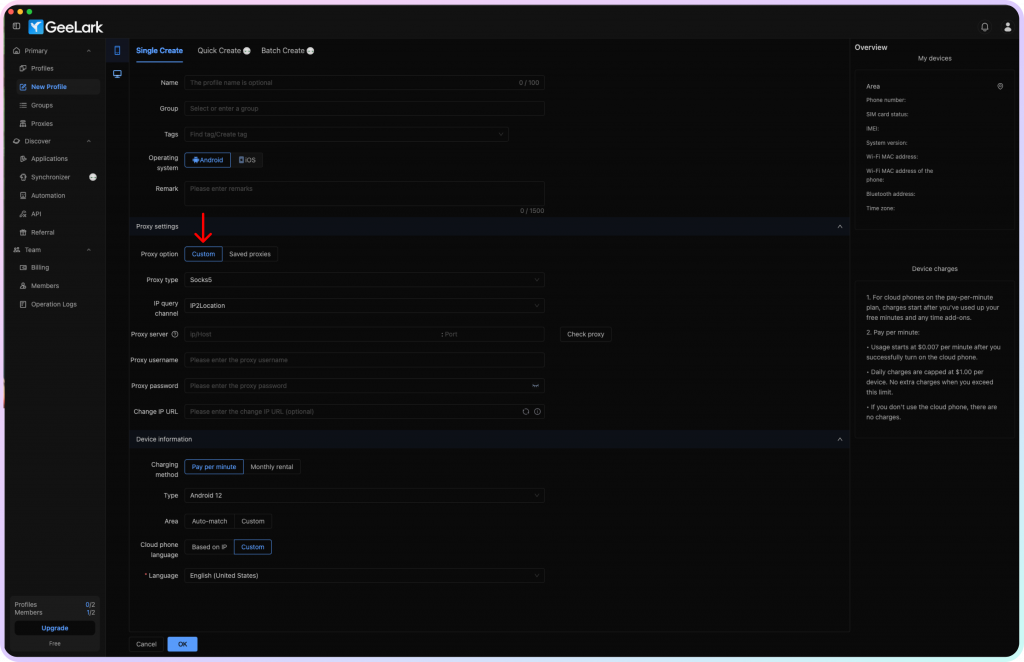
- Choose your preferred Proxy type from the available protocols:
HTTPHTTPSSocks5
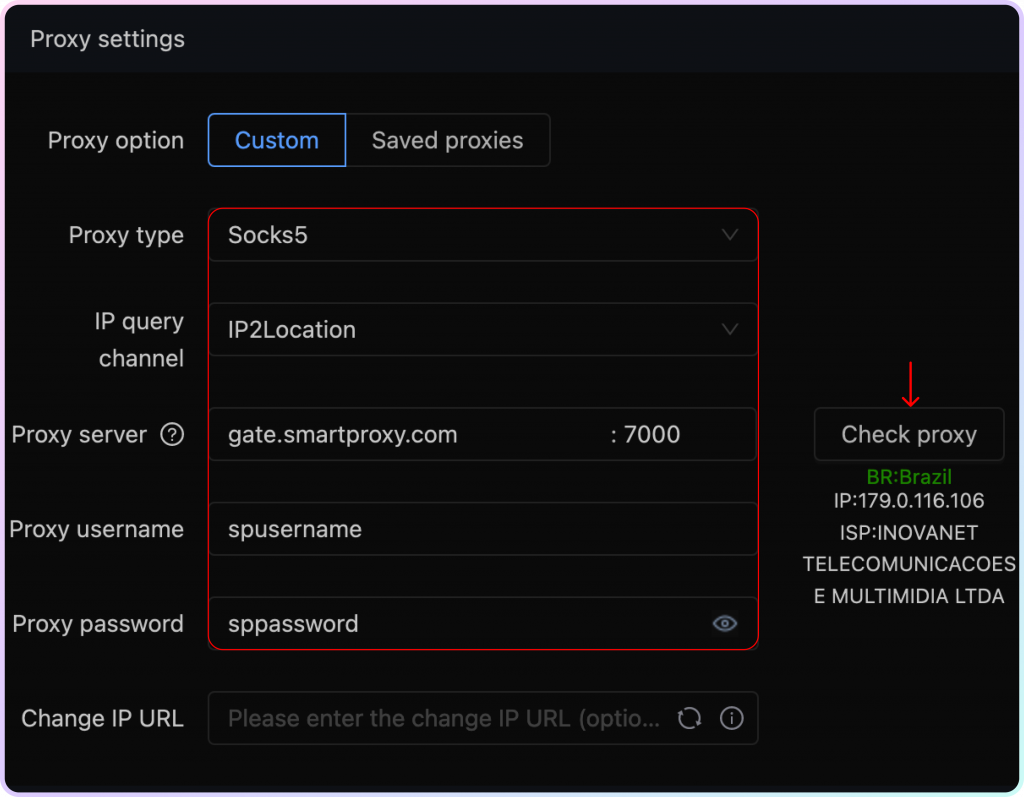
Entering Smartproxy Details
- Input your Smartproxy credentials and server information. For mobile proxies, use these settings:
- Proxy server:
gate.smartproxy.com - Port:
7000 - Username: Your Smartproxy username
- Password: Your Smartproxy password
- Proxy server:
- Use the Check proxy button to verify your connection settings.
Finalizing Setup
- Click OK to save your profile configuration.

- Your new profile will appear in the main interface. Click the Start button to launch your cloud phone profile.
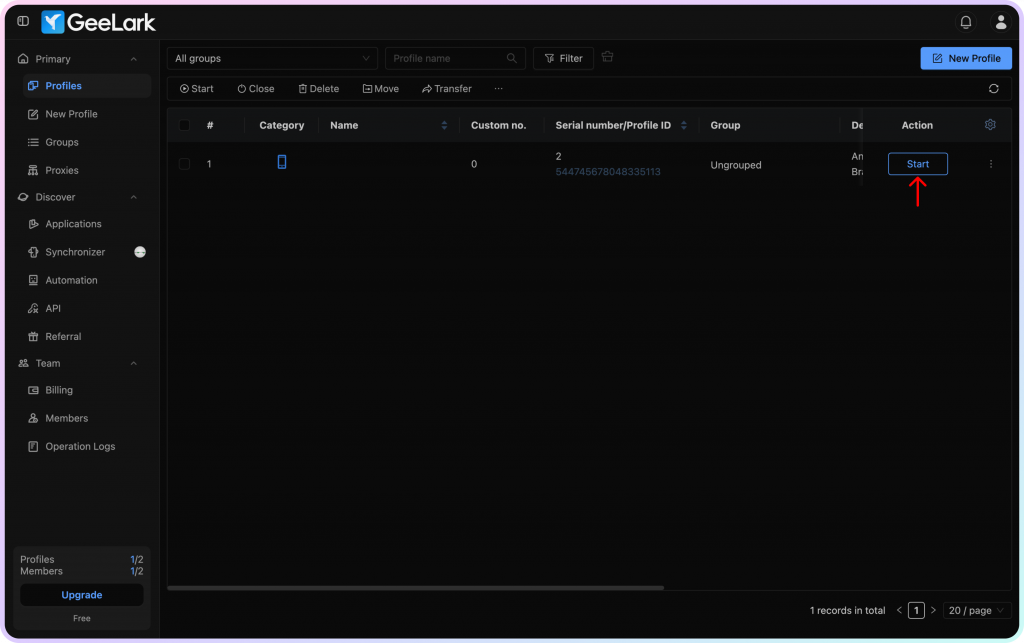
That’s it! Your GeeLark cloud phone profile is now ready to use. You can now access the internet through Smartproxy’s network of IPs.