How to Set Up A Proxy in GeeLark
Set up a proxy in a profile
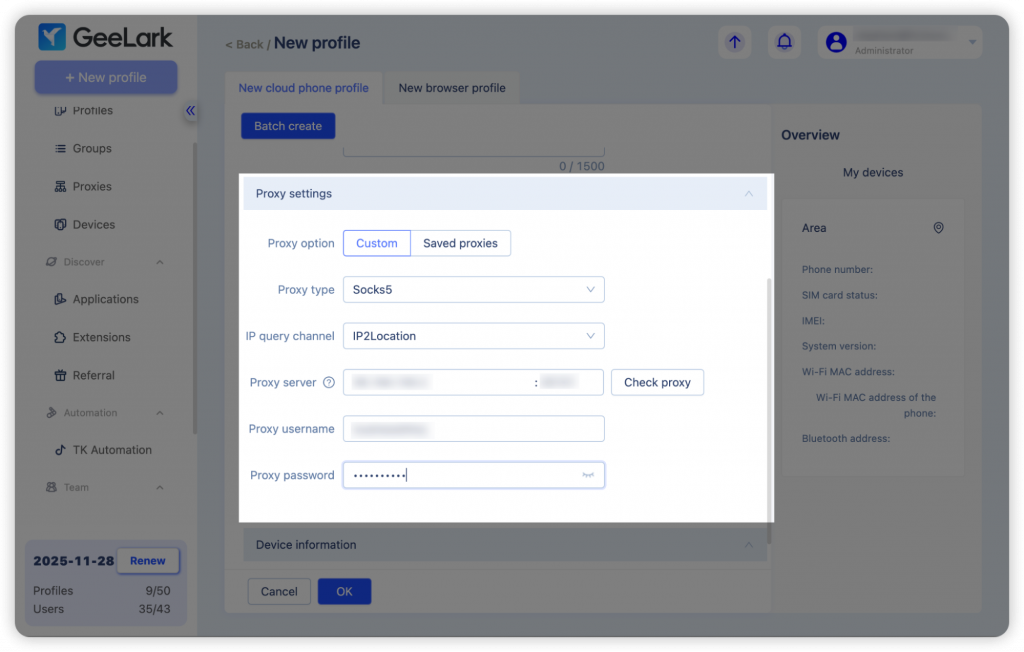
- A proxy is essential for creating a profile. To set up a proxy, fill out the necessary information, including proxy type, port, host, username, and password. Ensure all fields are entered correctly.
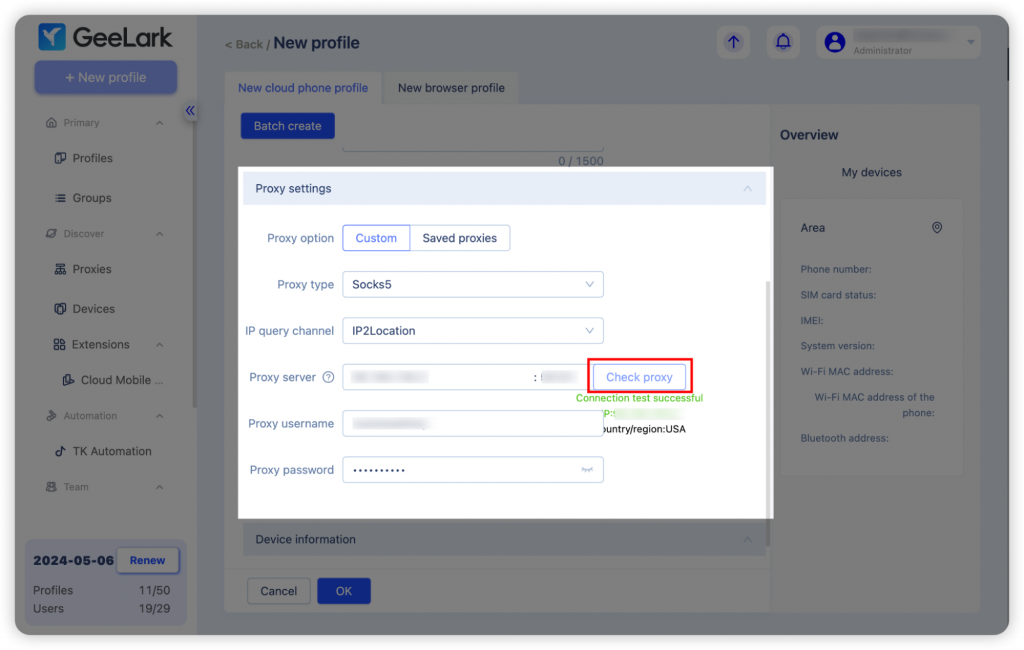
- To test your proxy connection, click the “Check proxy” option after entering the required details. GeeLark makes this process convenient by integrating with two IP address databases: IP2Location and ip-api. You can choose either database to verify the IP location effectively.
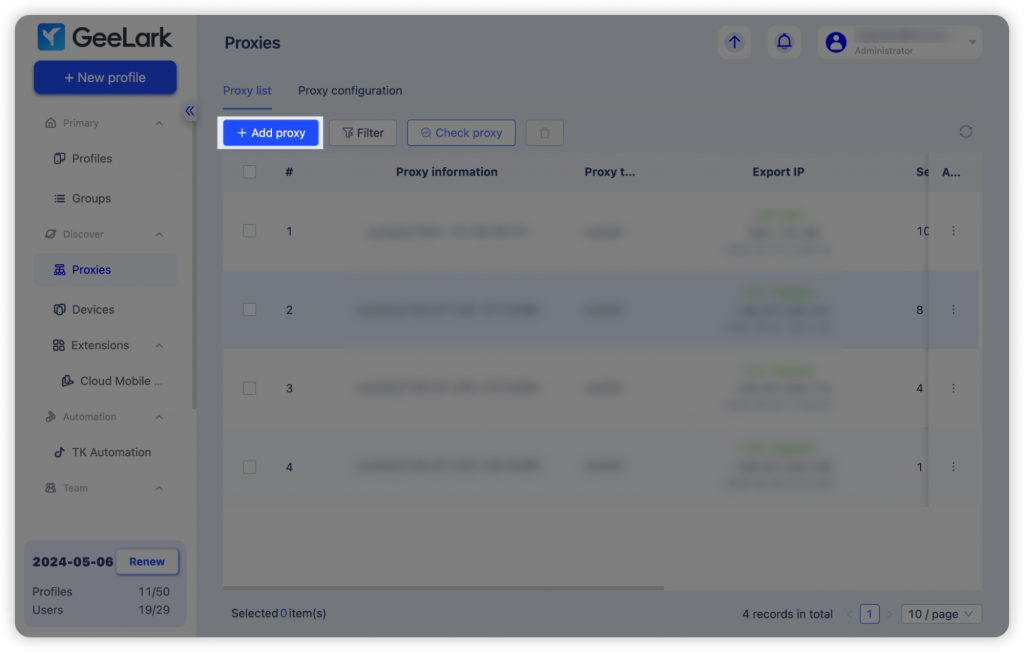
Add proxies to the Proxies section
- Rather than configuring a proxy for each profile individually, you can save time by adding proxies in bulk using the “Proxies” section. This method is both efficient and easy to manage.
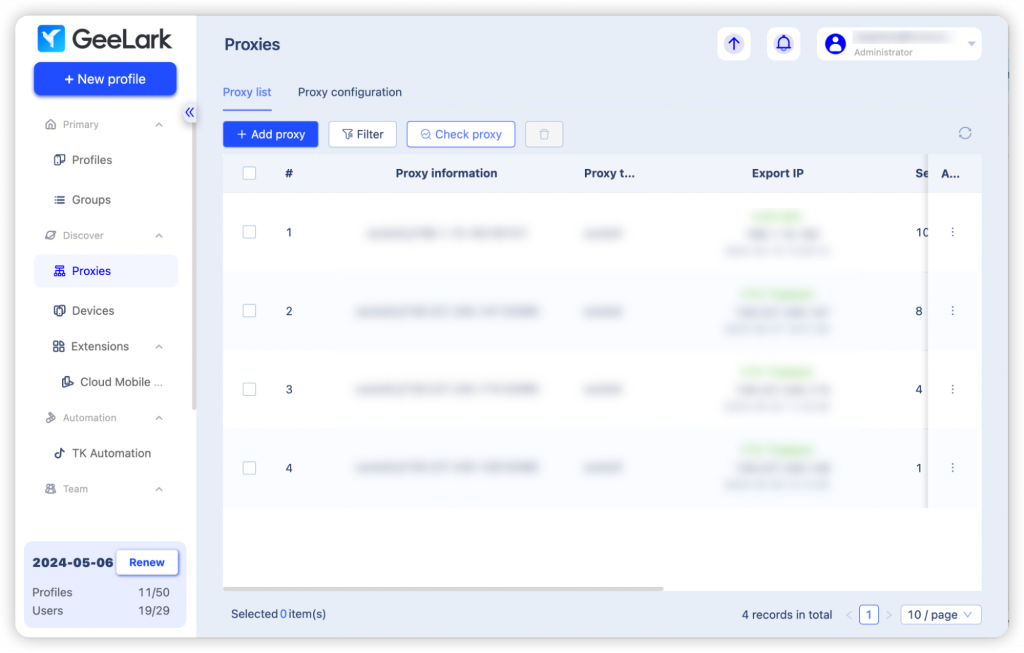
- To begin, select “Add proxy” in the Proxies section. This allows you to input multiple proxies at once, further streamlining the setup process.
- Enter the proxy details in the specified format, ensuring each proxy is entered on a new line. GeeLark checks for duplicate entries automatically, eliminating any repeated proxies.
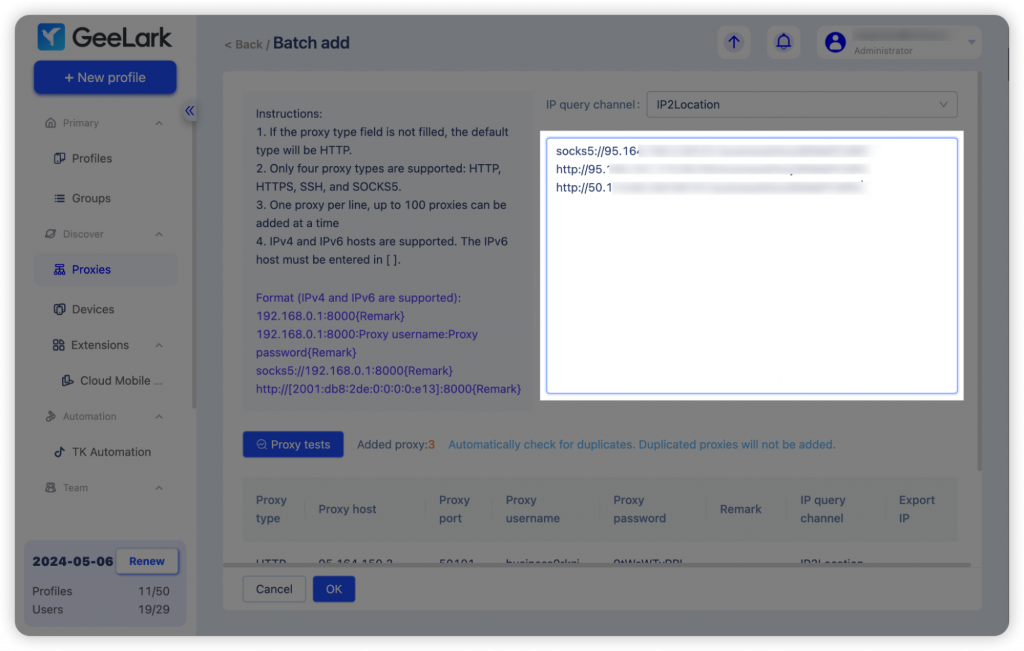
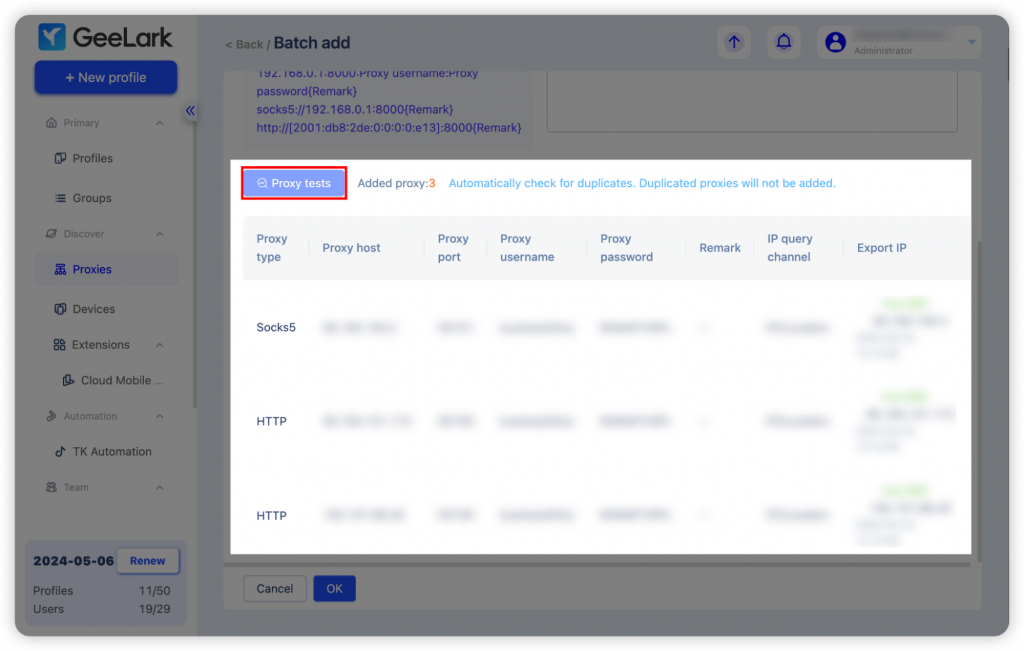
- After entering the proxies, conduct a “Proxy test.” This step verifies the IP connection and location for accuracy. Once satisfied, click “OK” to confirm the additions.
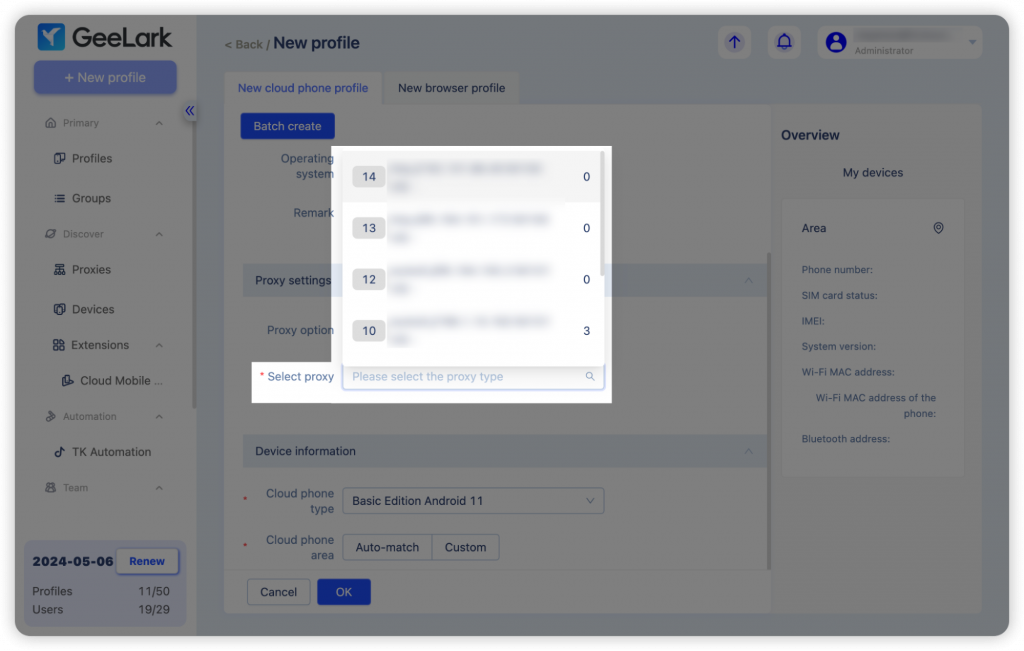
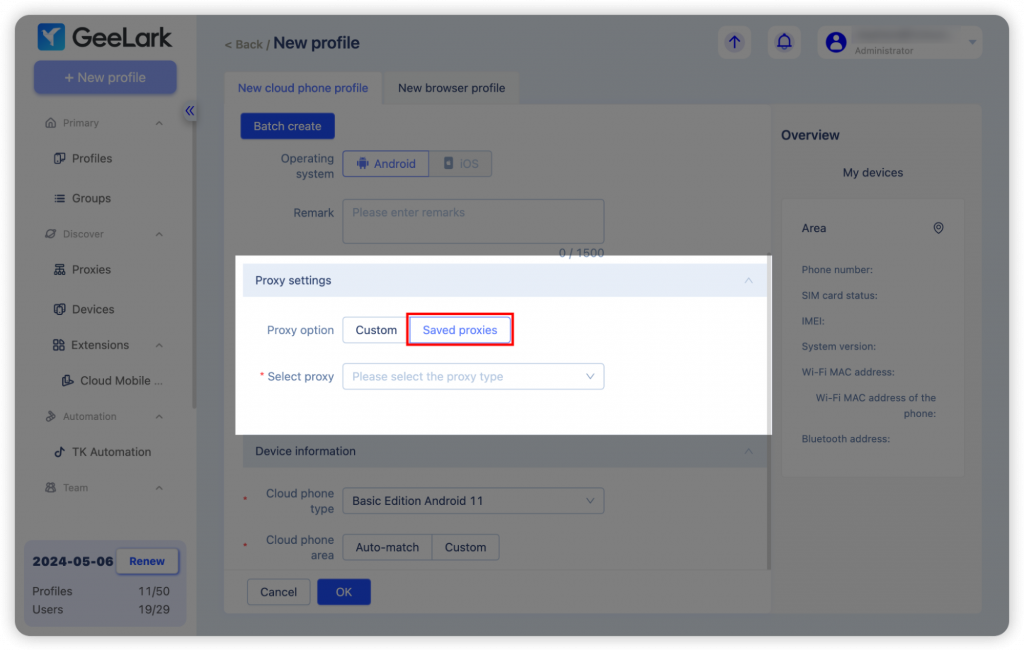
- Once added, the proxies will appear in the “Saved proxies” dropdown list. You can access them when creating or editing profiles, streamlining the entire workflow.
Each proxy is listed with two numbers: the left indicates its serial number in the Proxies section, while the right shows the number of profiles connected to it. This makes tracking proxy usage simple and efficient.